My guest post series continues today with a tutorial by Lu of
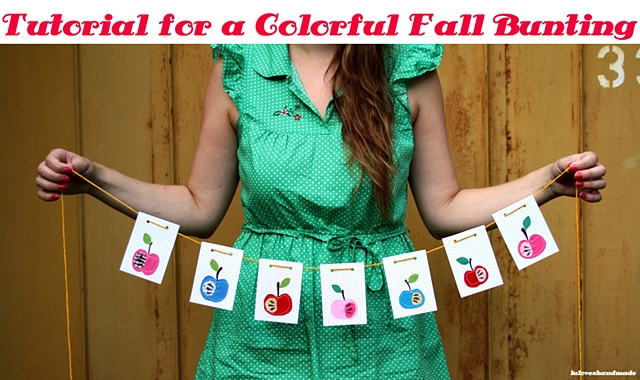
Luloveshandmade. She’s going to show you how to make a pretty colourful bunting for autumn using fabric scraps.
Lu’s blog posts never fail to make me smile and feel inspired. Everything she does is filled with lots of colours and positive energy. Lu is such a creative, talented and lovely girl and has the most amazing collection of colourful tights and leggings. On her blog, you can find everything from craft ideas and tutorials, room decor inspiration, outfit pictures, recipes and her sewing adventures to glimpses into her everyday life with her boyfriend and her cute dalmatian.
I’m so happy that she shares this pretty DIY on here today. Be sure to visit her blog and also take a look at
her awesome shop!
![kathastrophal // meet Lu [Luloveshandmade]](https://kathastrophal.de/wp-content/uploads/2012/09/luloveshandmade.png) Meine Gastpost-Serie geht heute mit einem Tutorial von der lieben Lu von Luloveshandmade weiter. Sie wird euch zeigen, wie man aus Stoffresten eine hübsche bunte Herbst-Girlande zaubern kann.
Lus Blogposts bringen mich immer zum Lachen und bieten so viel Inspiration. Alles, was sie macht, ist farbenfroh und voller positiver Energie. Lu ist so ein unglaublich kreatives, talentiertes und liebenswertes Mädchen und Besitzerin einer beneidenswerten Kollektion bunter Strumpfhosen und Leggings. Auf ihrem Blog findet man alles von Bastel-Ideen und Tutorials über Raumeinrichtungsinpirationen, Outfit-Bildern, Rezepten und ihren Näh-Abenteuern bis hin zu schönen Einblicken in ihren Alltag mit ihrem Freund und ihrem süßen Dalmatiner.
Ich freu mich riesig, dass sie euch heutes dieses schöne Tutorial auf meinem Blog präsentiert. Schaut auf jeden Fall mal bei ihr vorbei, und seht euch doch auch mal in ihrem tollen Dawanda-Shop um!
Meine Gastpost-Serie geht heute mit einem Tutorial von der lieben Lu von Luloveshandmade weiter. Sie wird euch zeigen, wie man aus Stoffresten eine hübsche bunte Herbst-Girlande zaubern kann.
Lus Blogposts bringen mich immer zum Lachen und bieten so viel Inspiration. Alles, was sie macht, ist farbenfroh und voller positiver Energie. Lu ist so ein unglaublich kreatives, talentiertes und liebenswertes Mädchen und Besitzerin einer beneidenswerten Kollektion bunter Strumpfhosen und Leggings. Auf ihrem Blog findet man alles von Bastel-Ideen und Tutorials über Raumeinrichtungsinpirationen, Outfit-Bildern, Rezepten und ihren Näh-Abenteuern bis hin zu schönen Einblicken in ihren Alltag mit ihrem Freund und ihrem süßen Dalmatiner.
Ich freu mich riesig, dass sie euch heutes dieses schöne Tutorial auf meinem Blog präsentiert. Schaut auf jeden Fall mal bei ihr vorbei, und seht euch doch auch mal in ihrem tollen Dawanda-Shop um!

 Hallo liebe LeserInnen von Kathas wunderbarem Blog KathaStrophal! 🙂 Ich bin Lu von Luloveshandmade und Katha war so lieb mich einzuladen, so dass ich zu ihrer Aktion „Goodbye Summer, Hello Autumn“ eine Anleitung beisteuern kann. 🙂
Ich möchte euch zeigen wie man mit einfachen Mitteln und aus Resten eine schicke und bunte Wimpelkette als Herbstdeko machen kann. Viel Spaß! 🙂
Hallo liebe LeserInnen von Kathas wunderbarem Blog KathaStrophal! 🙂 Ich bin Lu von Luloveshandmade und Katha war so lieb mich einzuladen, so dass ich zu ihrer Aktion „Goodbye Summer, Hello Autumn“ eine Anleitung beisteuern kann. 🙂
Ich möchte euch zeigen wie man mit einfachen Mitteln und aus Resten eine schicke und bunte Wimpelkette als Herbstdeko machen kann. Viel Spaß! 🙂
Hello dear readers of Katha’s awesome blog KathaStrophal! 🙂 I’m Lu of Luloveshandmade and Katha was so kind to invite me for her special “Goodbye Summer, Hello Autumn” so that I could contribute a tutorial.
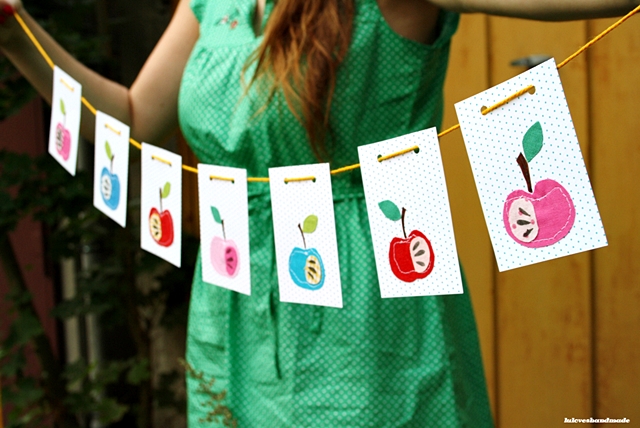
I want to show you how to make a pretty and colorful bunting as decor for fall with simple means and with using fabric scraps. Have fun! 🙂
 Dazu braucht ihr bloß Pappkarton, viele bunte Stoffreste, Nadel und Faden oder eine Nähmaschine, Kleber (ich habe den weißen Bastelkleber aus dem Idee Markt genommen), einen braunen Filzstift, einen Locher und Wolle.
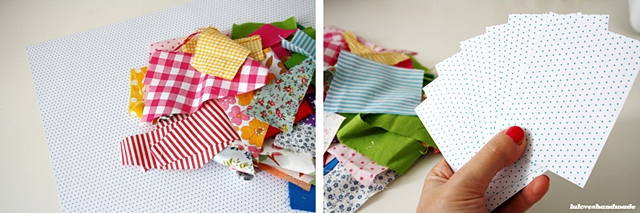
You only need some cardboard, many colorful fabric scraps, needle and thread or a sewing machine, glue (I have used white crafting glue from Idee), a brown felt tip, a punch and wool.
 Schneidet euch als Wimpel ein paar gleich große Karten aus dem Pappkarton aus. Dann schneidet aus Stoffresten kleine apfelförmige Stücke aus. Diese könnt ihr dann per Hand oder mit der Nähmaschine auf den Karton nähen. Dann nehmt noch mehr Stoffreste für die Blätter und um die Äpfel zu verzieren.
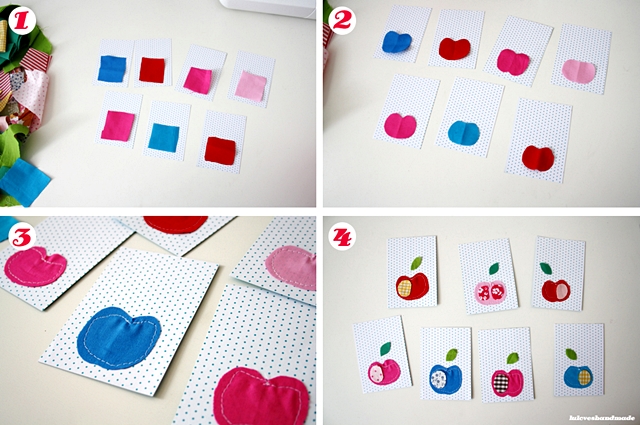
For making your buntings, cut out some pieces of cardboard of about the same size. Then cut out some apple-shaped pieces of fabric and sew them onto the cardboard, either with a sewing machine, or by hand. Then take even more fabric scraps for the leaves and to embellish the apples.
 Mit einem Textilstift oder auch Filzstift könnt ihr nun schwarze Kerne auf die Äpfel malen und dann die Blätter und die Verzierungen aufkleben. Nehmt danach euren braunen Filzstift um den Stiel aufzumalen.
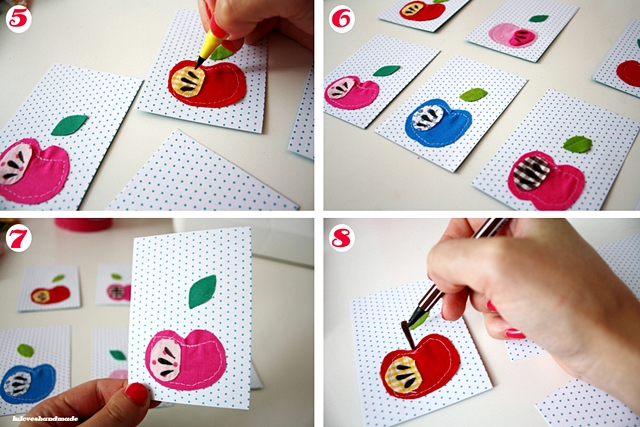
You can now paint the seeds onto the apples with a textile pen or with a felt tip and then you can glue the embellishments and the leaves onto the apples and the cardboard. Afterwards, take your brown felt tip to paint the stalk.
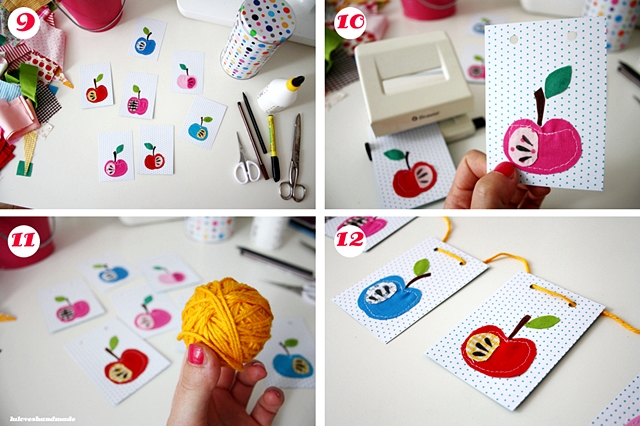 Nun müssen die Karten nur noch gelocht werden und dann könnt ihr die Wolle zum Aufhängen durchziehen.
Fertig! 🙂
Danke nochmal für die Einladung, liebe Katha, es war mir eine Freude! 🙂
Nun müssen die Karten nur noch gelocht werden und dann könnt ihr die Wolle zum Aufhängen durchziehen.
Fertig! 🙂
Danke nochmal für die Einladung, liebe Katha, es war mir eine Freude! 🙂
Now you only need to punch holes in the cardboard and then you can thread in the wool to hang up the bunting.
That’s it! 🙂
Thank you again for the invitation, dear Katha, it was a pleasure! 🙂

Thank you so much for this fantastic idea & tutorial, Lu! ♥
Vielen lieben Dank für diese super Idee & das Tutorial, liebe Lu! ♥
[I’m on vacation right now. You can follow along
on Instagram if you’d like!
Im Moment bin ich im Urlaub. Wenn ihr mögt, könnt ihr ein bisschen davon bei Instagram mitbekommen!]


5 Kommentare
Superschön geworden!
20. September 2012 um 13:19Total TOLL!!
20. September 2012 um 14:53Ich steh doch so auf Äpfelchen!!
Bei Zeit und Langeweile auf jeden Fall ein DIY zum Nachbauen 🙂
Hihi, als Lu mir die Bilder geschickt hat, musste ich auch direkt an dich denken 😀
20. September 2012 um 22:11Das wär was für die Küche bei mir 🙂
LG
24. September 2012 um 18:19So einfach und doch so wirkungsvoll – toll! Hat Lu mal wieder schön gezaubert! (:
26. September 2012 um 18:32